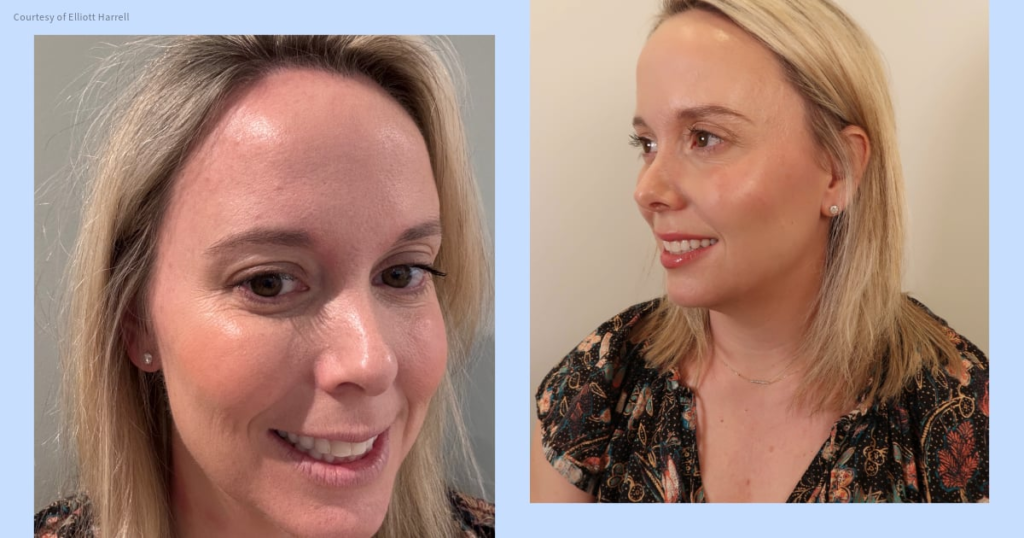
Transforming “Conservative Girl” Makeup: A Journey to Correction After Watching Suzanne Lambert’s Viral Video on MAGA Beauty Trends.
:upscale()/2025/04/11/820/n/1922153/tmp_janDyE_0560a86b762648ca_conservative_makeup_transformation_2_Up_Side_by_Side_-_Blue-2-Main_-_2_Up_-_Blue.png)
As I viewed Suzanne Lambert’s now-viral video titled “doing makeup like the stunning MAGA girls,” I found myself cringing. With every remark—neglecting skin prep for optimal makeup adherence on dry areas, avoiding contour or bronzer resulting in a “flat” appearance, and applying blush too low creating a droopy effect—I cringed even more.
Although I’m firmly not supportive of any MAGA-related matters, I realized I was guilty of many mistakes Lambert mentioned. I felt ashamed and deflated—almost as if I needed a sign stating, “I’m not MAGA, I just lack makeup skills.”
I enjoy a touch of glam but have never deeply pursued it. I wasn’t that girl who raided her mom’s lipstick stash or splurged babysitting money on drugstore beauty buys. Instead, I relied on makeup artists in department stores to refresh my look every few years and passively accepted their suggestions, feeling overwhelmed at places like Sephora or trying to keep up with YouTube makeup tutorials.
Set on shedding any trace of the “conservative girl” makeup trend, I contacted Samara Perchick, a local makeup artist I discovered on Instagram, for assistance. Perchick offers her Natural Glow Academy, a two-hour session designed to teach individuals effective application techniques for natural makeup.
She listened as I detailed my current products and routine. The conclusion? She kindly confirmed the mistakes I already suspected I was making, such as using a foundation too yellow for my complexion and a definitely dried-out mascara.
Following that, Perchick guided me through each step, transforming me from a misdirected MAGA girlie to someone Lambert could appreciate. She provided numerous tips, but here are five simple changes she recommended that can significantly enhance your final look (just in case you, too, are worried you’ve fallen into the trap of “Republican” makeup).
Tip 1: Just a Bit of Concealer Works Wonders
Much like in Lambert’s video, I had been excessively applying concealer, wrongly believing more would better conceal my dark under-eye circles. The copious amount combined with my lack of skin prep resulted in visible creases.
Instead, Perchick advocates for a small upside-down V-shape at the inner corner of each eye and an upward line at the outer corners. For blending, avoid swiping the concealer across the entire under-eye area.
“Any concealer will spread,” she explains. “This area tends to crease, so we shouldn’t overload it with product.” By applying just a bit at the corners, she demonstrated how I could blend it out and still conceal without risking heavy creasing.
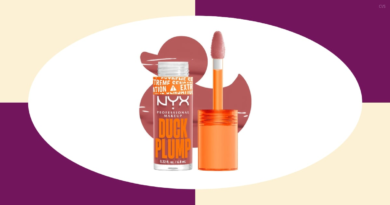
Recommended product: Benefit Cosmetics Cakeless Concealer ($28)
:extract_cover():upscale():fill(ffffff)/2025/04/11/826/n/1922153/2f8abb8467f96461b623e9.51191433_Screenshot_2.png)
Tip 2: Incorporate Contour for Dimension
Before embarking on this journey, I had never experimented with contouring. I’d observed tutorials featuring a bronzing stick, but the fear of applying it incorrectly and resembling someone with a dirty face paralyzed me.
Perchick noted, “Omitting contour creates a flat and unnatural appearance on the face,” stressing the importance of adding dimension when using foundation, as “no one with a bare face presents a uniform color.”
Perchick advised me to make a fishy face while applying contour, suggesting I draw lines under my cheekbones, along my jawline, and around my forehead. The instant difference was undeniable—it truly defined my features instead of leaving me looking matte and flat.
Recommended product: Westman Atelier Face Trace Contour Stick in Biscuit ($26)
:extract_cover():upscale():fill(ffffff)/2025/04/11/826/n/1922153/ec3e838c67f9645b6413c0.16029790_Screenshot_2.png)
Tip 3: Apply Blush Higher on Your Cheeks
I always thought that blush belonged precisely on the apples of my cheeks; I’ve been doing this for around 25 years. Additionally, I wasn’t blending my blush properly, resulting in a distinct area of color that appeared quite harsh.
Perchick refers to her blush application technique as the “Batman mask method.” Picture wearing a Batman mask—that’s the area where you should apply your blush for an elevated effect.
She begins by applying blush on the outer edges of the “mask,” and only after achieving the desired coverage does she lightly apply to the apples. Also, she advised that since blush tends to fade quickly, applying slightly more than you think necessary can help, pairing it with a powder blush for lasting power.
Recommended products: Merit Beauty Flush Balm in Beverly Hills and Archival ($30) and Makeup by Mario SoftPop Powder Blush in Mellow Mauve ($30)
:extract_cover():upscale():fill(ffffff)/2025/04/11/826/n/1922153/4e0d2f1267f964544a3c80.80923865_Screenshot_2.png)
Tip 4: Avoid Mascara Mishaps by Looking Down
Another issue Lambert highlighted was getting mascara on the eyelids without cleaning it up—a habit I’ve definitely fallen into often. Besides switching out my dried mascara (it had been over a year, oops!), she provided a tip for avoiding this frequent problem.
Using a handheld mirror, look down while applying mascara. (It’s a dreadful angle, so brace yourself, but if you can handle it, you can successfully apply mascara without smudging it on your eyelids.)
Recommended product: Maybelline Lash Sensational Sky High Waterproof Mascara ($13)
:extract_cover():upscale():fill(ffffff)/2025/04/11/817/n/44344577/shopPOTtbw.png)
Tip 5: Lip Liner for Definition
My 4-year-old wears more lipstick than I do and even calls me out for leaving the house without any. Similar to contouring, I had never utilized lip liner before and felt equally unnerved by it.
Perchick explained, “Blend the lip liner in so it appears softer.” As she began outlining my lips and noticed my anxious expression, she reassured me, “Don’t worry; it won’t look right until you add lipstick.” She was correct. The liner added definition to my lips, and along with the lipstick and gloss she selected, it truly completed the look.
Recommended products: Makeup by Mario Sculpting Lip Pencil in Lauren ($26), Charlotte Tilbury Hyaluronic Happikiss Lipstick Balm in Enchanting Kiss ($35), and Tower28 Beauty ShineOn Jelly Lip Gloss in Sesame ($16)
:extract_cover():upscale():fill(ffffff)/2025/04/11/826/n/1922153/1de6892267f9644c89b5a2.29210691_Screenshot_2.png)
:extract_cover():upscale():fill(ffffff)/2025/04/11/826/n/1922153/bd838a3f67f9644646a9c8.57510482_Screenshot_2.png)
Final Reflections
My makeup routine was in desperate need of an update, so although I’m still somewhat stung by Lambert’s blunt comments, her video motivated me to finally take a makeup lesson. Ultimately, a few simple adjustments made a remarkable difference, and I have to say it’s been delightful experimenting with my new products. Is this how most teenage girls feel?
I debuted my new look at my husband’s birthday party, and numerous guests complimented my makeup unaware that I’d taken a lesson, which felt incredibly validating as it’s something I’ve rarely heard before. While I might not become a dedicated makeup fanatic, who knows? I might just find myself wandering around a Sephora every now and again with my new-found confidence.
Elliott Harrell is a freelance writer based in Raleigh, NC, with two young daughters, who manages a sales team by day and writes about her passions, including women’s health, parenting, and food, at night. Apart from PS, her work is published in The Everymom, Motherly, Business Insider, Eater, and more.